

ATTACKED A SPENT UNIT
↓FIGHT!
Compare both Units’ power.
- The higher power Unit defeats the other.
- On a tie, they defeat each other.
Move defeated Units to the trash and resolve any ![]() effects on them.
effects on them.
In Cyberpunk Trading Card Game (TCG), you’re the leader of your very own crew, competing against your Rival to become a Night City Legend. Take on Gigs, crush your enemies, boost your Street Cred, and go down in history. To play, you need a set of six dice (d4, d6, d8, d10, d12, d20) and a deck of Cyberpunk TCG cards.
The goal is to amass the majority of Gig dice and secure them for a whole turn. Get there by playing cards to send your Units into the field, equip them with Gear to augment their abilities, and deploy Programs at strategic moments to help ensure their success.
The higher you climb in Night City, the tougher the fight gets. Your growing reputation grants access to more powerful tools and abilities, but beware: the same is true of your Rival. Lock down your crew to protect a valuable roll, or set your sights on your Rival’s Gigs if their reward looks a little more enticing. The only way to get anything in this city is to take it, after all.
True notoriety requires more than winning a few street fights. Secure those Gigs, stockpile your Eddies, and claim glory as a Night City Legend!
Your goal is to control the majority of Night City’s Gigs, represented by the Gig dice that enter play each turn. Protect your own Gig dice and attack your Rival to steal theirs.
START YOUR TURN WITH 7 GIGS TO WIN
If a player has at least 7 Gig dice in their Gig area at the start of their turn, they win the game.
OVERTIME: 7 GIGS WINS INSTANTLY
OVERTIME begins after the last player’s 7th turn. Overtime is sudden death; as soon as a player has a majority of Gig dice in their Gig area, they win.
Each discrete die is a single Gig. So, while the values on your Gig dice might enable cool card effects, controlling two dice is always closer to winning than controlling one die.
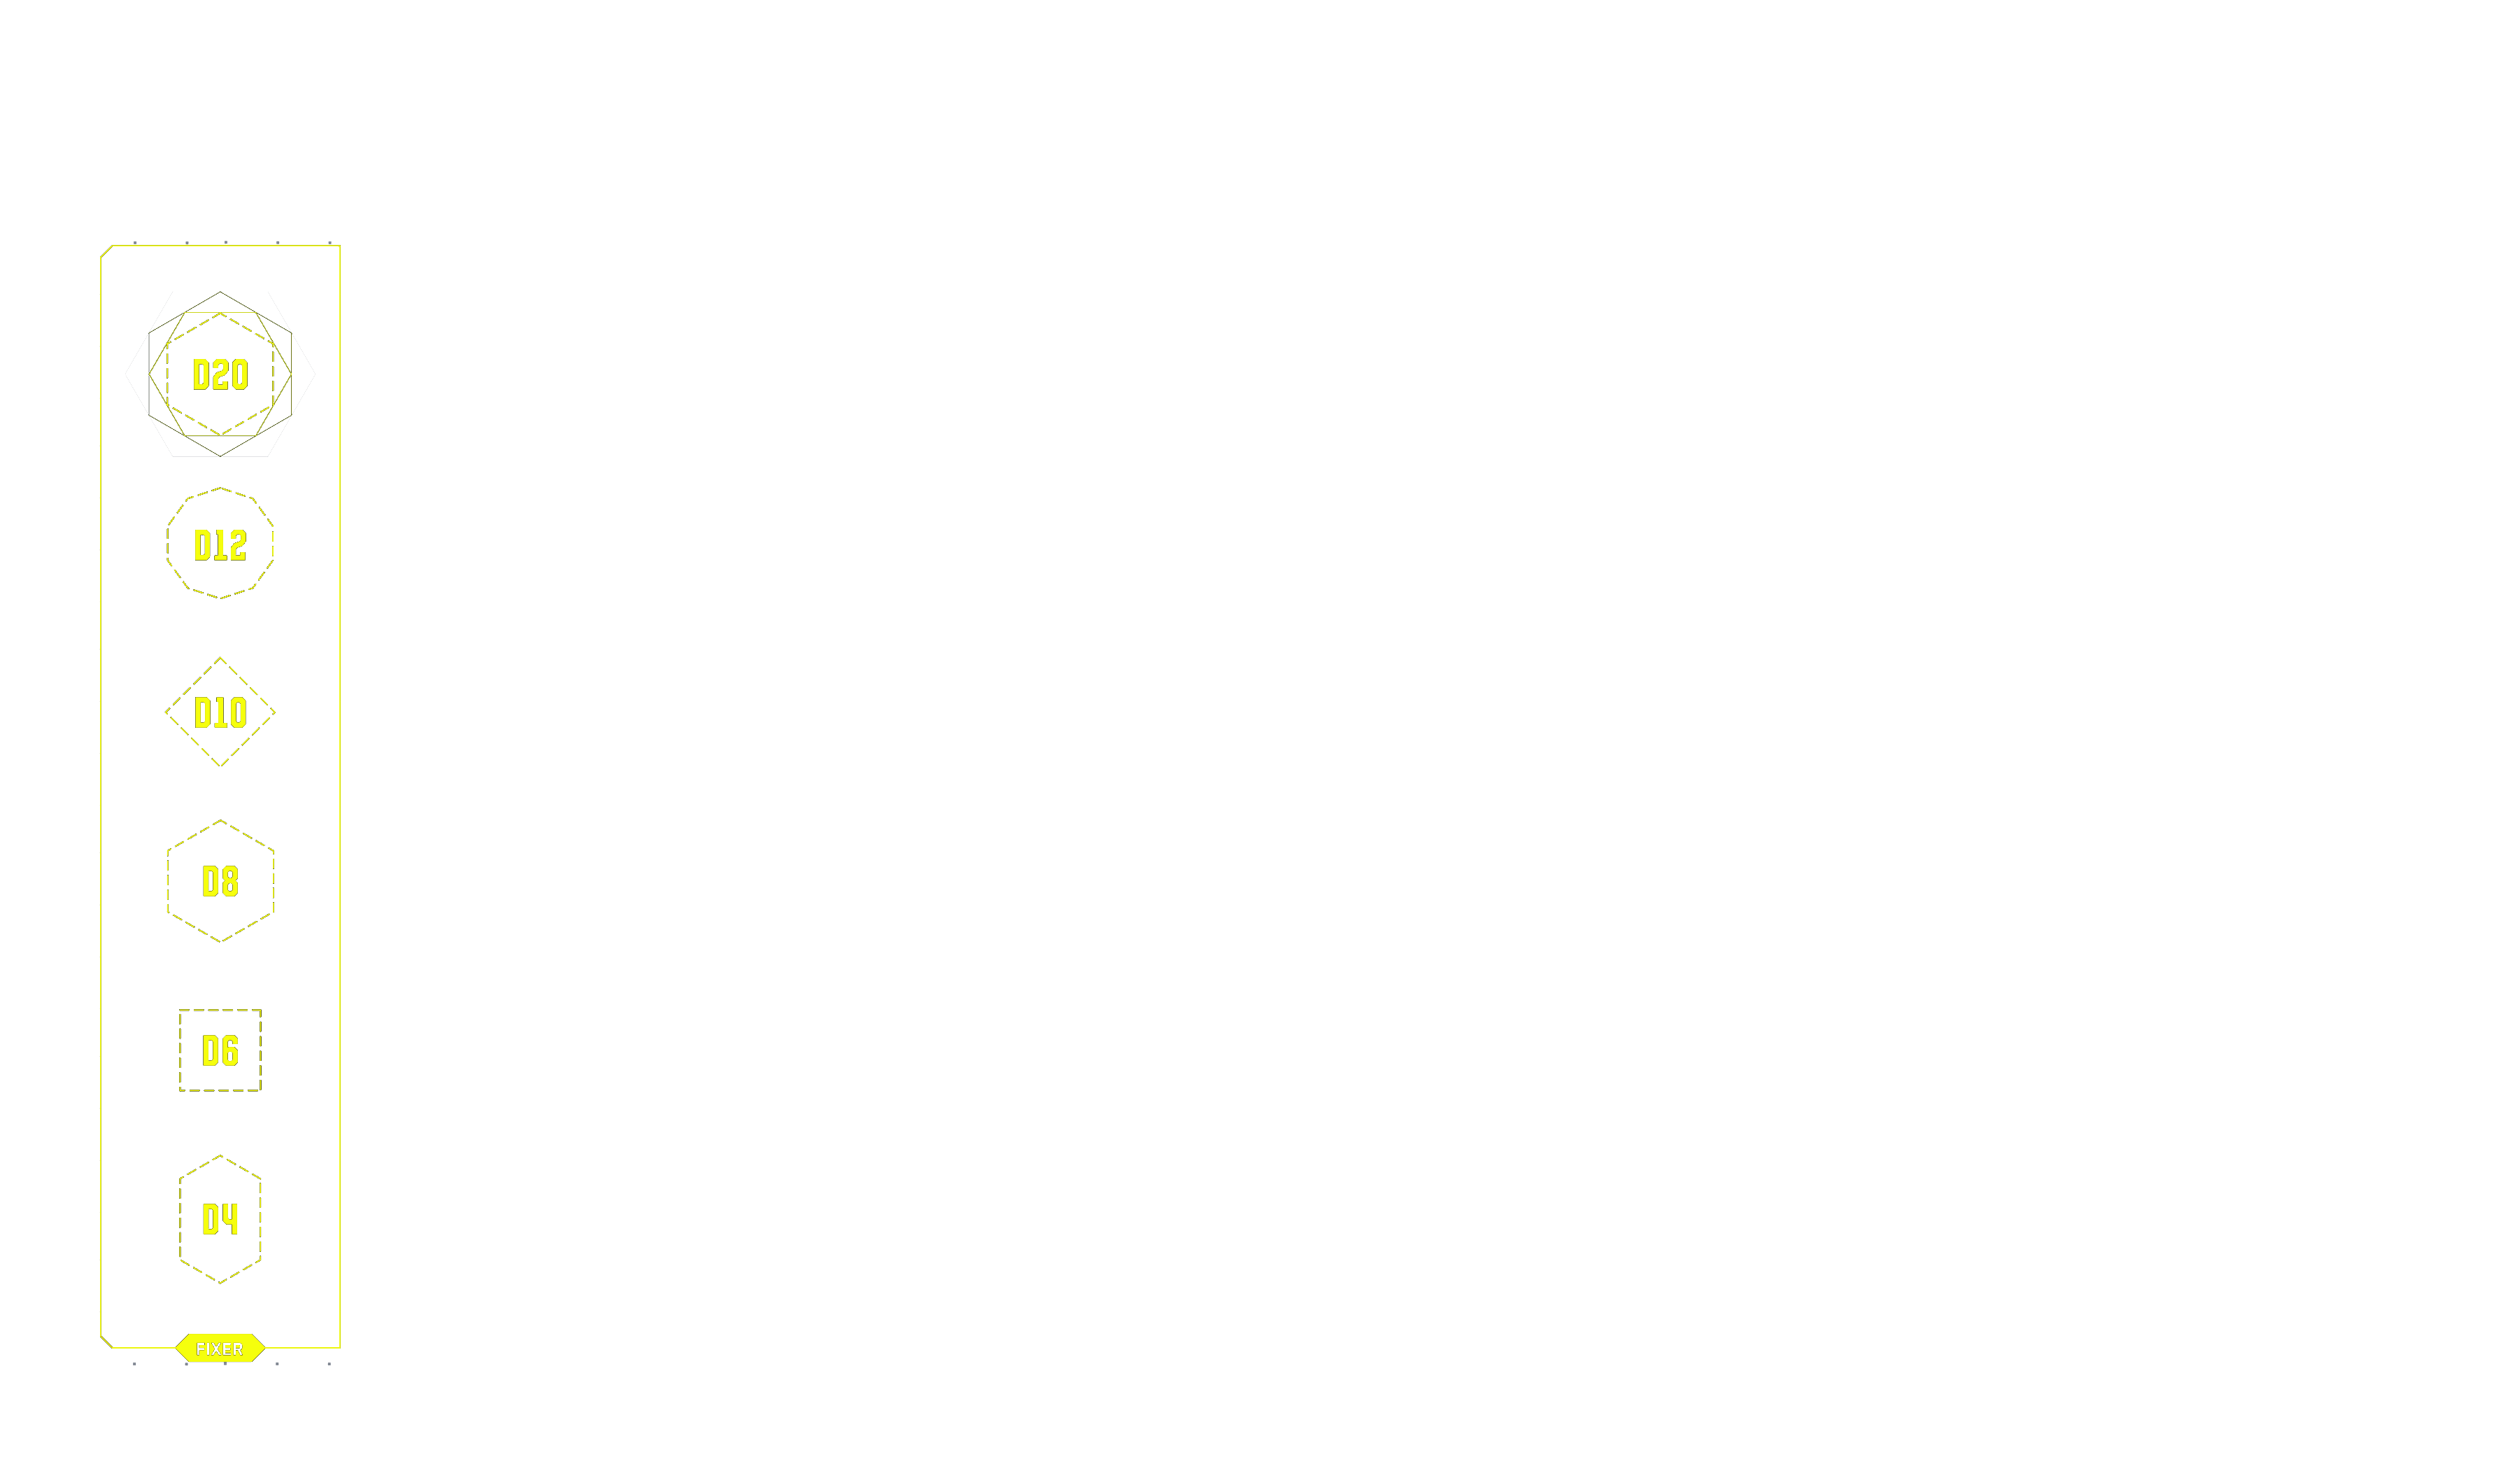
| FIXER AREA | All your Gig dice start here at the beginning of the game; they represent job offers that a fixer has lined up for you. At the start of your turn, after drawing a card, choose one Gig die from this area. Roll it to set its value, then move it to your Gig area. You can choose any die you want, except for the twenty-sided die (d20), which is always last. |
| GIG AREA | This area is for the Gigs that you control – AKA friendly Gigs – including any stolen from your Rival. If you start your turn with 7 Gig dice in this area before taking one from the fixer area, you win the game. Some card effects require a certain amount of ☆ (Street Cred) to activate. Street Cred is the sum total of your Gig dice values. In other words, add up all the numbers on the top faces of your dice to get your Street Cred. |
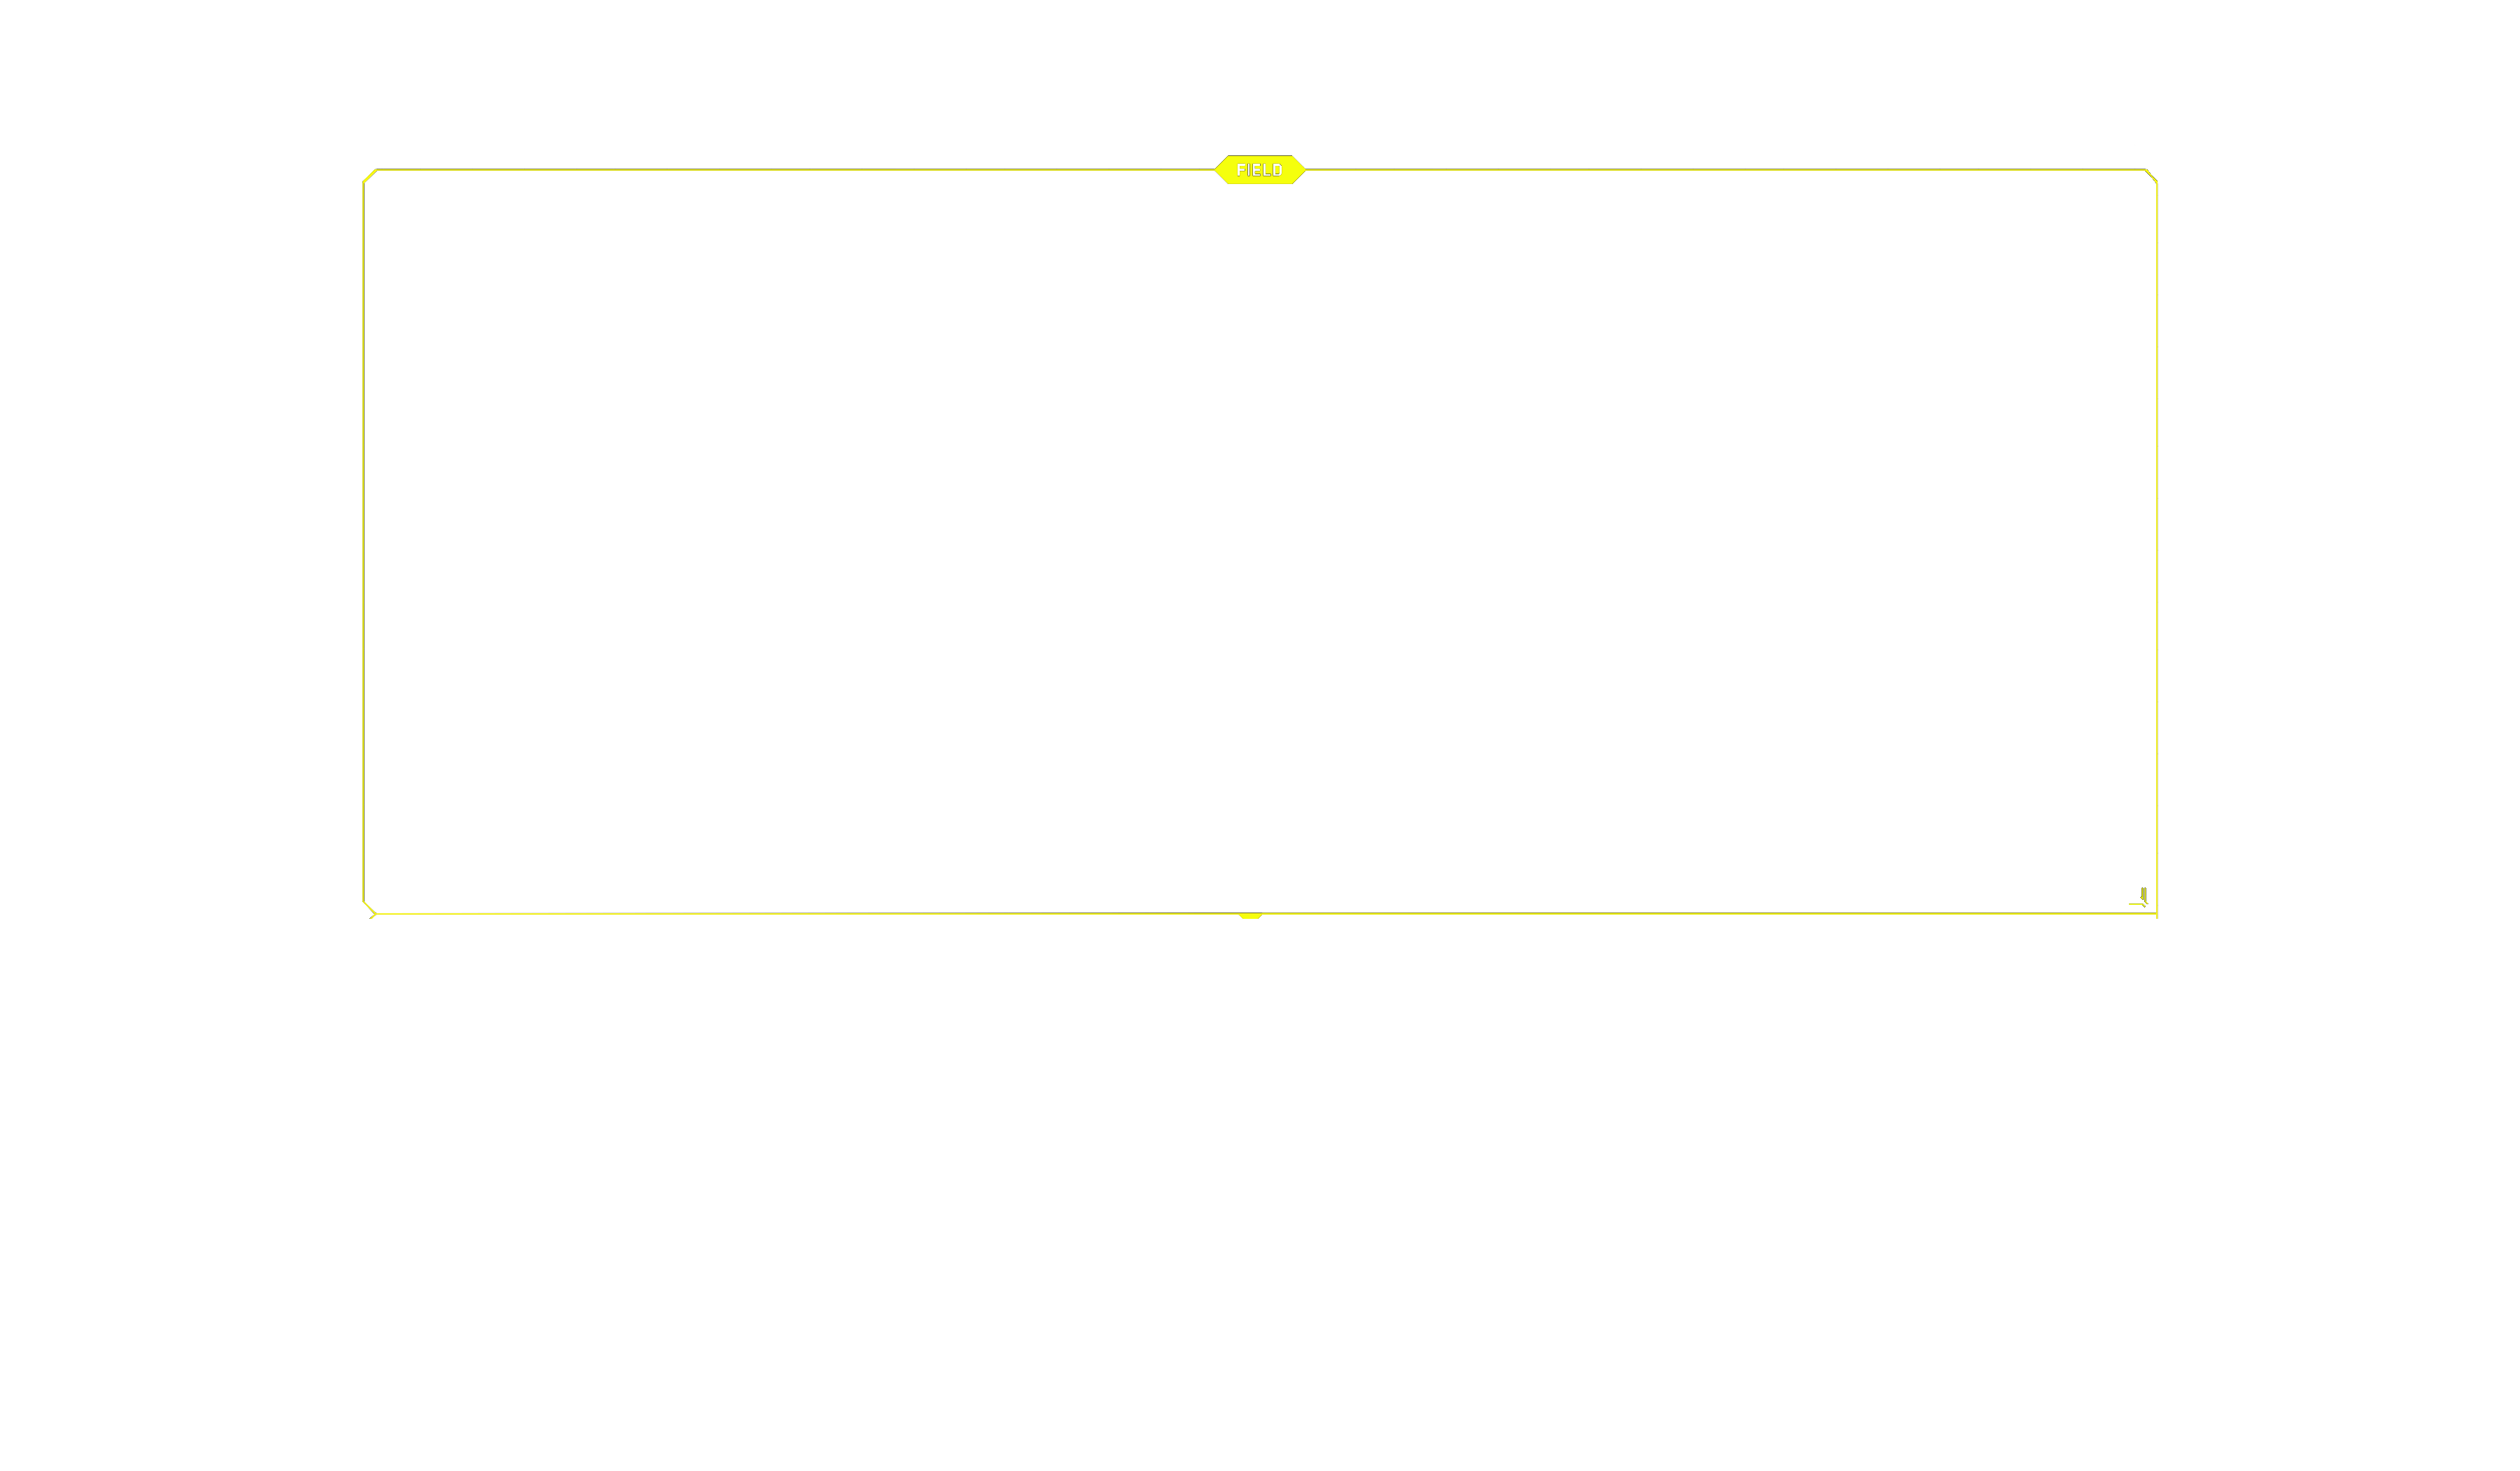
| FIELD | The field is where you play Units — and where the action happens. Units here represent active members of your crew; they can attack one of your Rival’s spent Units to start a fight, or attack your Rival’s Gig area to steal a Gig. Learn about attacking in the MAIN PHASE section. |
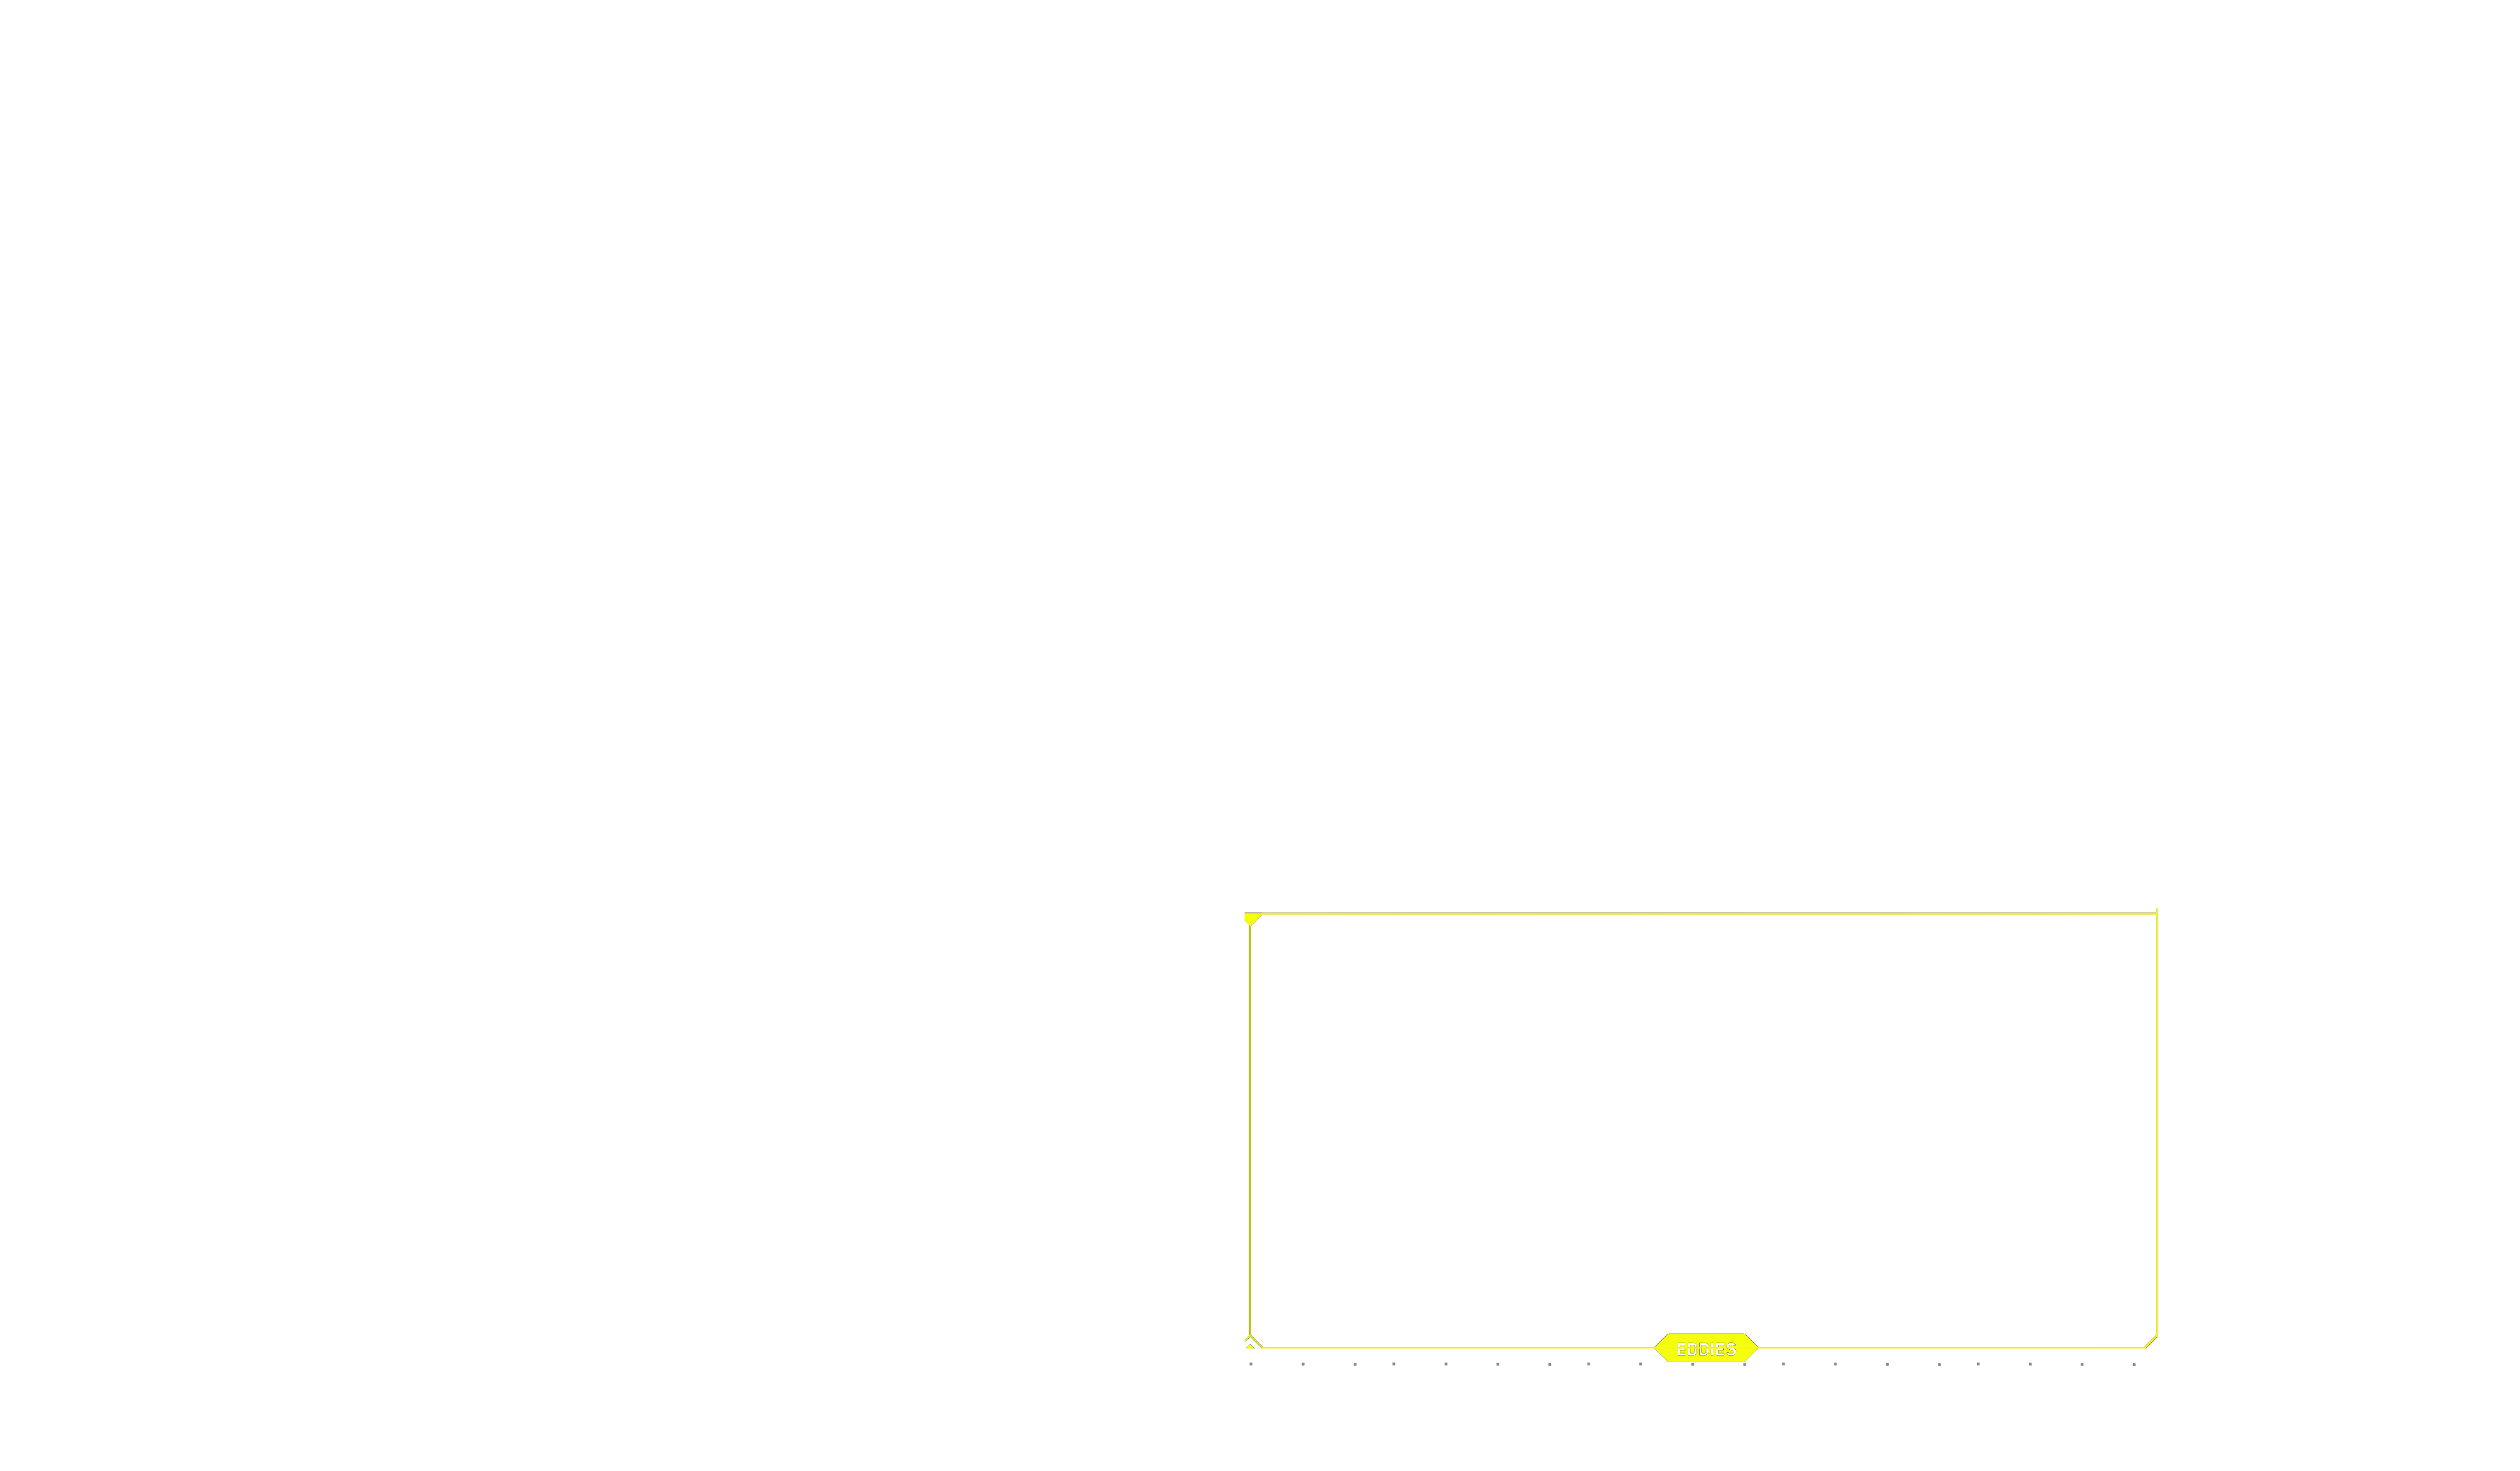
| EDDIES AREA | Eddies (or €$) are the currency around here. Nothing in Night City is free; to play a card, you need to pay its cost: the number in the top left corner. Pay a cost by spending (turning sideways) that number of Eddies. This area starts out empty, and you need to sell cards from your hand to create Eddies. Learn how to sell cards for Eddies in the MAIN PHASE section. |
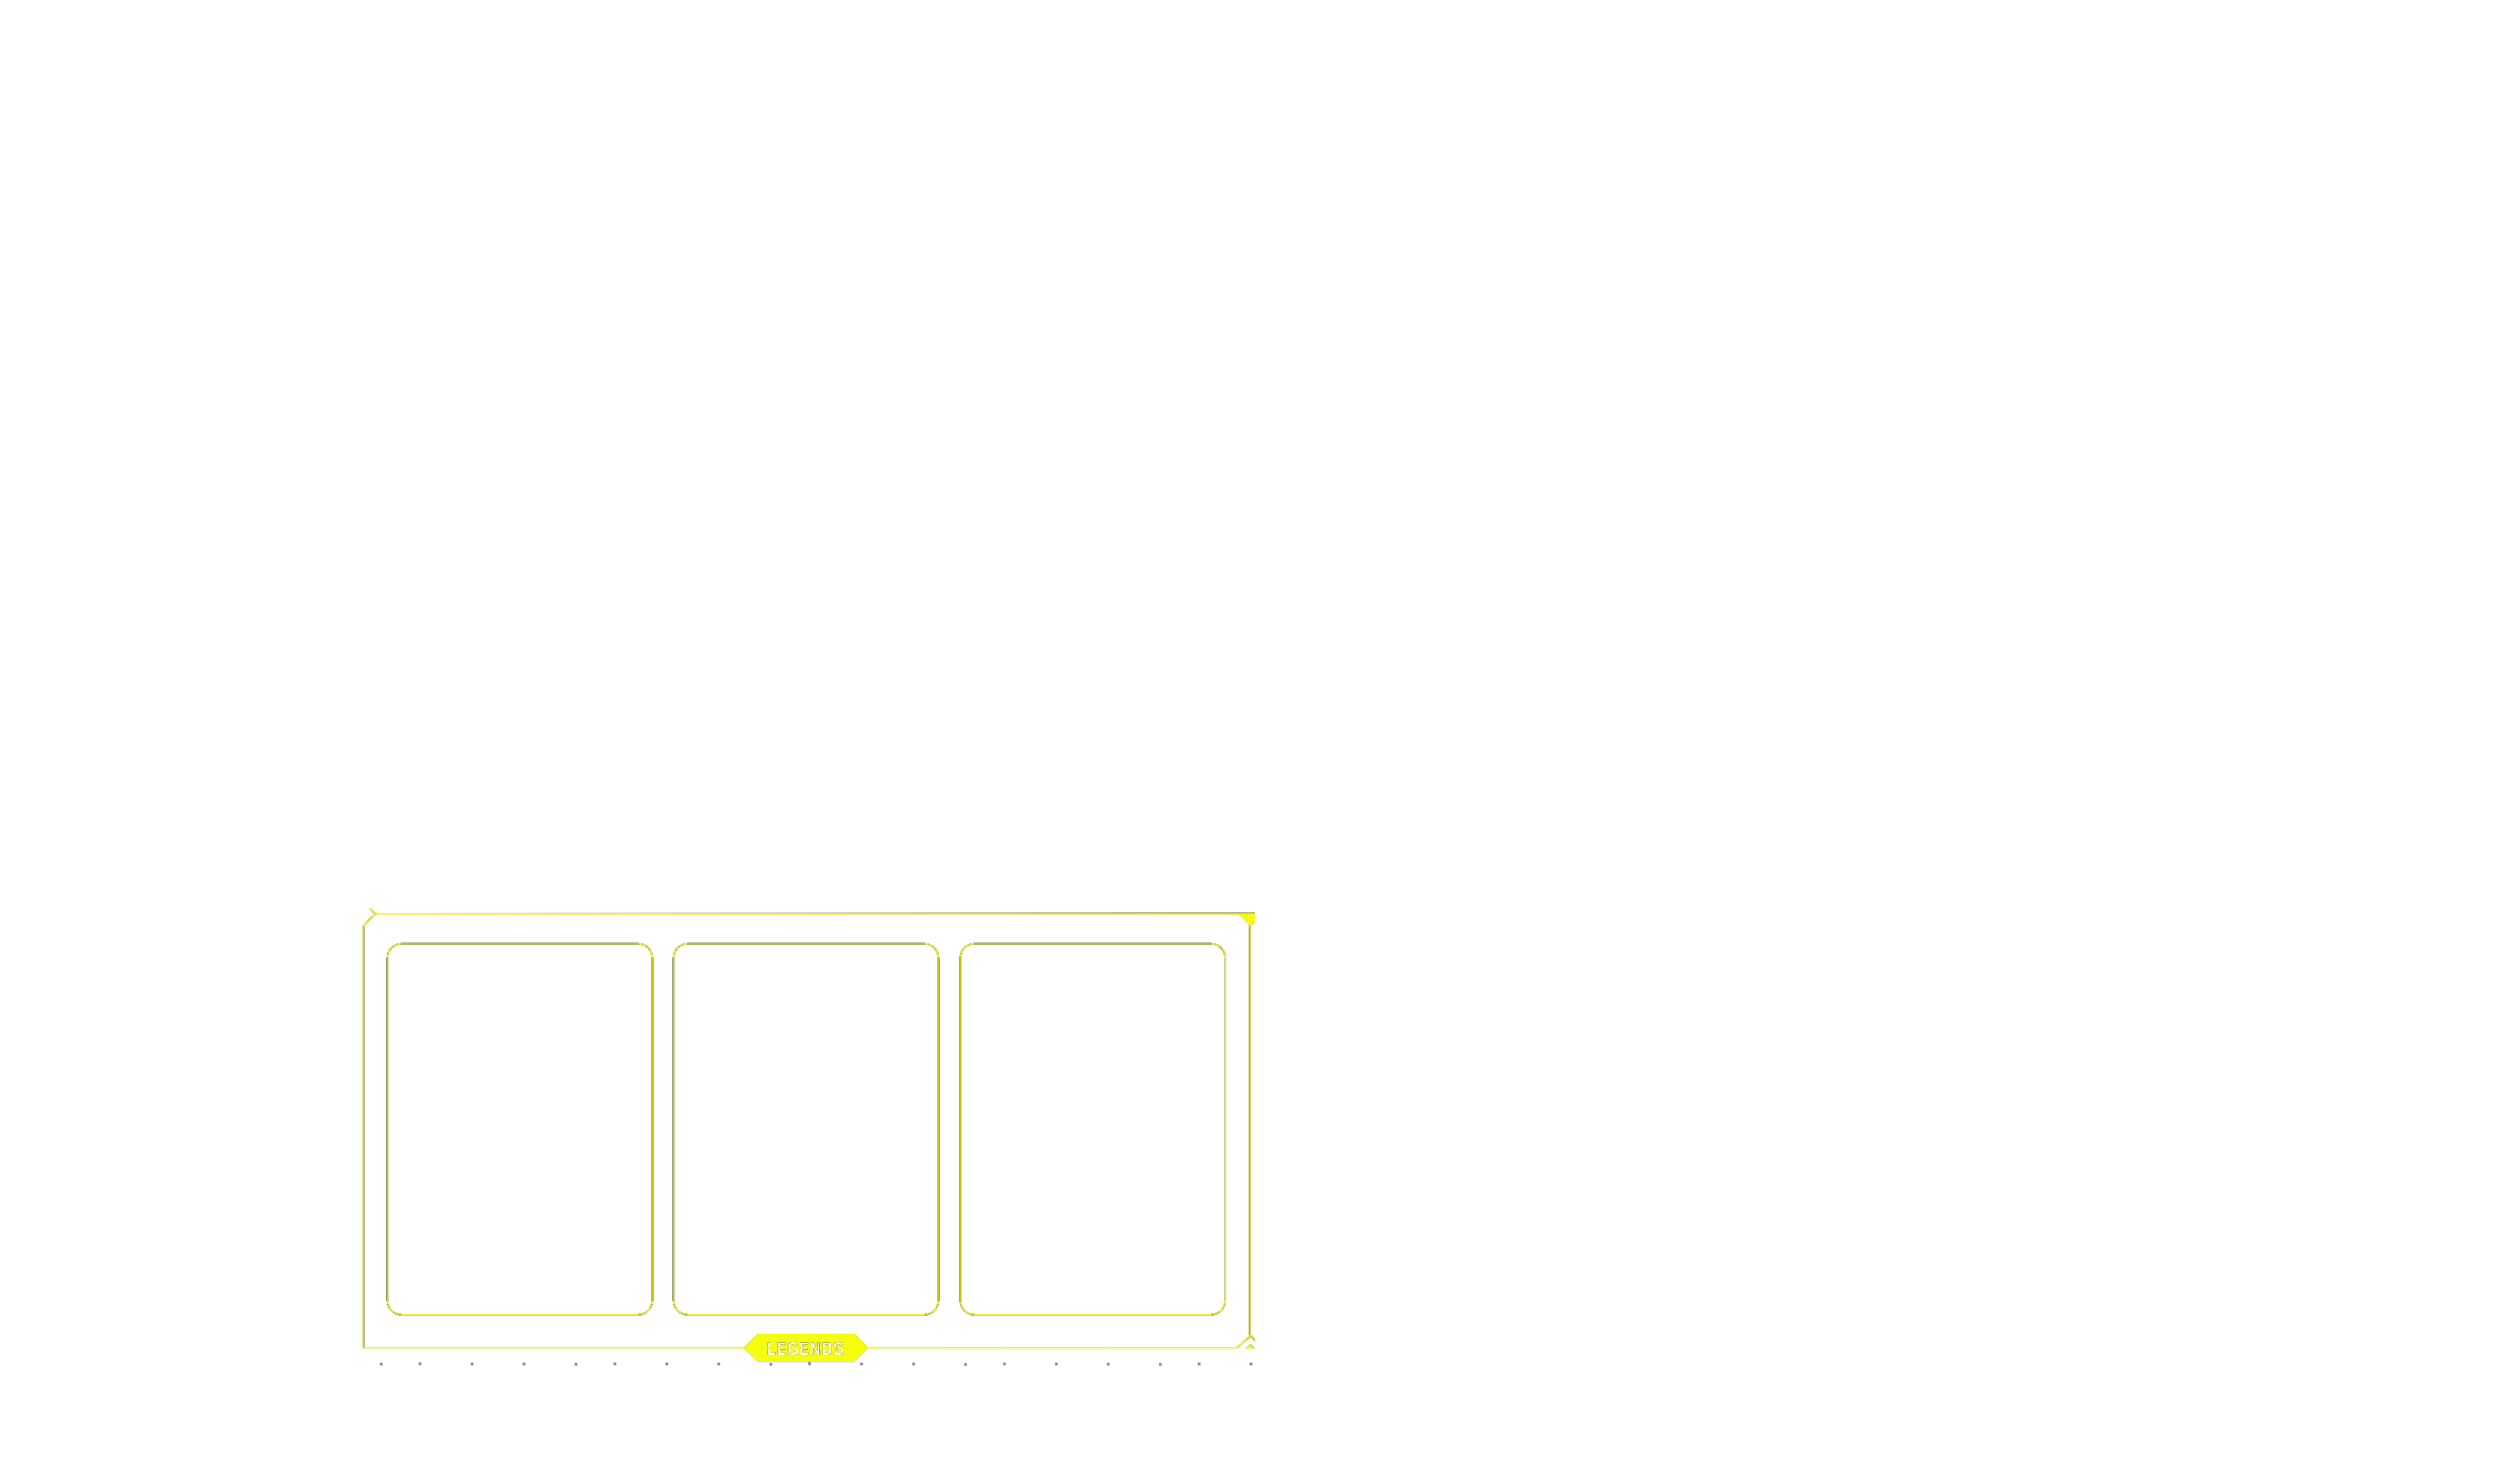
| LEGENDS AREA | The 3 cards here are your Legends — notorious characters from Night City that provide unique effects for your crew. They start the game face-down in a random order. Once per turn, you may Call a Legend by spending 1 €$ to flip a Legend face-up, without looking first. Whether face-up or face-down, you can also spend a Legend to pay 1 €$ (like spending an Eddie). |
| DECK | Place your deck here. Whenever you draw a card, take it from the top of your deck. |
| TRASH | When a card is discarded, defeated, or trashed, put it face-up here. |
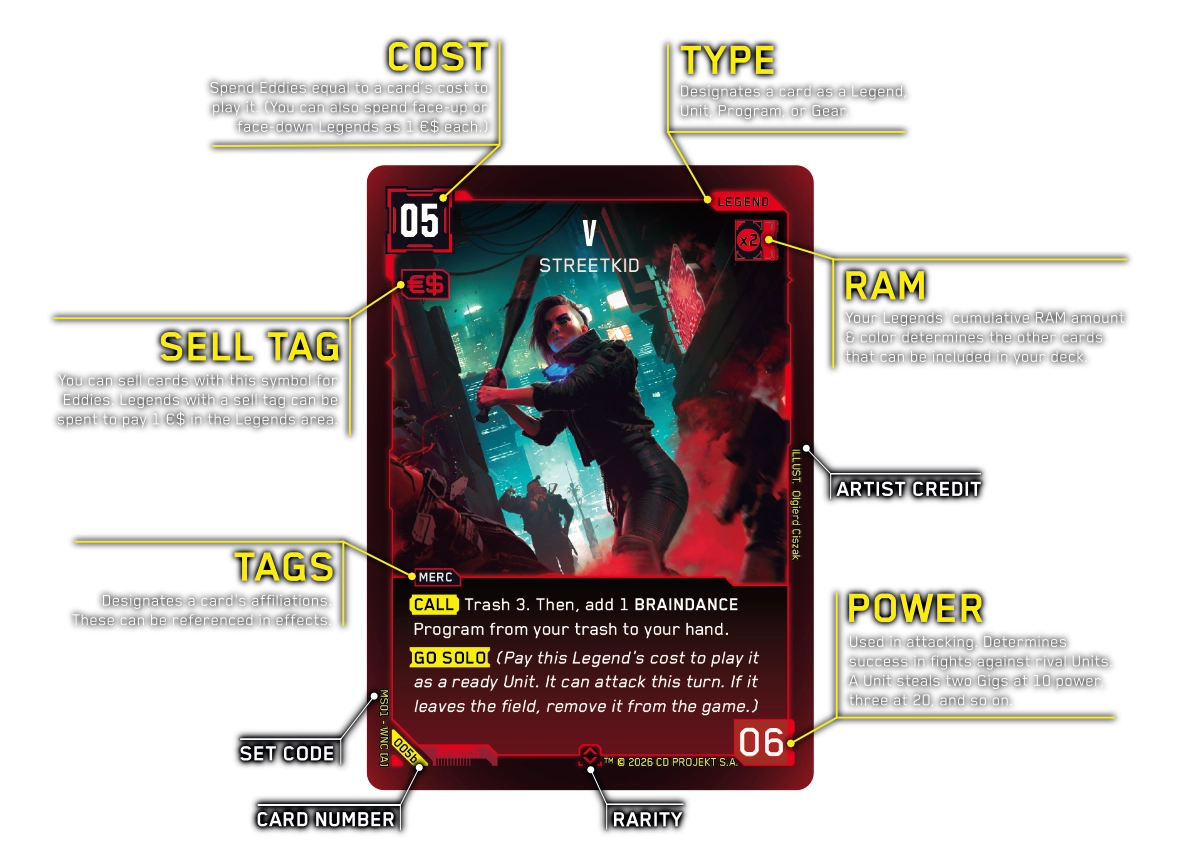
A card’s type label is in the top right corner. It designates the card as a Legend, Unit, Program, or Gear.
| LEGEND | Legends are a deck's centerpiece characters that provide unique effects for your crew. All 3 Legends begin face-down in a random order. Once per turn, you can Call a Legend by spending 1 €$ to flip one face-up at random. You can also spend any number of Legends as 1 €$ each, whether face-up or face-down. |
| UNIT | Units are members of your crew that fight rival Units and steal your Rival's Gigs. To play a Unit, pay its cost and place it ready in the field area. Units can't attack on the turn they're played. |
| PROGRAM | Programs are instantaneous effects that shake up the field and keep your Rival on their toes. To play a Program, pay its cost, resolve the effect, and immediately move it to the trash. |
| GEAR | Gear cards bolster your Units and Legends with special effects and advantages. To play a Gear card, pay its cost and equip it to a friendly Unit or Legend. When a card moves to a different area (like the trash or back to your hand), all equipped Gear goes with it. |
Some card text may include highlighted words.
TIMING TRIGGERS have a convex highlight and specify conditions that allow or create an effect; they tell you “when” the effect happens. The text after the timing trigger indicates “what” effect transpires when the conditions are met.
| When you play this card. | |
| When you flip this Legend face-up through Call a Legend. | |
| When this Unit attacks (and before your Rival reacts). | |
| When this Unit is defeated. |
KEYWORDS have a concave highlight and indicate an effect that is standard across all cards that have it. A keyword’s effect may be explained in parentheses immediately afterwards, but you can otherwise find all explanations here.
| This Unit can attack the turn it's played. | |
| Pay this Legend's cost to play it as a ready Unit. It can attack this turn. If it leaves the field, remove it from the game. | |
| You may also activate this effect (or play this Program) as a reaction when a rival Unit attacks. | |
| When a rival Unit attacks, you may spend this Unit to redirect the attack to it instead. |
Before you begin, each player follows these steps to set up the game.
Each turn in Cyberpunk TCG has two phases: the START PHASE and the MAIN PHASE.
At the start of your turn, complete all of these steps in order.
During your main phase, you can do any number of these steps in any order.
Each Unit attacks individually, and completes all the attacking steps before another Unit can attack. You can choose to attack a spent rival Unit or your Rival’s Gig area. Depending on your target, the attack plays out a little differently.
The attacked Rival may take any number of these reactions.
Compare both Units’ power.
Move defeated Units to the trash and resolve any ![]() effects on them.
effects on them.
Choose a rival Gig die and move it to your friendly Gig area. Units steal an extra Gig for every 10 power (and 0 Gigs at power 0).
If you don’t want to put a Unit in a vulnerable position, it doesn’t have to attack at all. Ready Units can’t be attacked. But keep in mind that most Units, even ready ones, won’t be able to protect your Gigs. Only Units with reaction effects like ![]() or
or ![]() can interrupt attacks, so they’re typically the only Units worth keeping ready. You can’t become a Legend without taking some risks, after all.
can interrupt attacks, so they’re typically the only Units worth keeping ready. You can’t become a Legend without taking some risks, after all.
When a ![]() Unit redirects your attempt to attack your Rival directly, a fight plays out as though your Unit attacked the blocking Unit instead. Even if you defeat it, you don’t steal any Gigs for that attack. In general, if an effect redirects or stops a direct attack on your Rival, you don’t get to steal a Gig.
Unit redirects your attempt to attack your Rival directly, a fight plays out as though your Unit attacked the blocking Unit instead. Even if you defeat it, you don’t steal any Gigs for that attack. In general, if an effect redirects or stops a direct attack on your Rival, you don’t get to steal a Gig.
To build your own Cyberpunk TCG deck, stick to these requirements:
Cards can only be included in decks with sufficient RAM. Your Legends set the RAM limits for your deck. The RAM color values on each card in your deck must be less than or equal to your Legends’ total RAM color values.
All Legends have a colored border and a RAM limit in the top right corner of their card. For example, the Goro Takemura: Hands Unclean Legend has 2 Green RAM. So, you can add any Green cards with a RAM value of 2 or less to your deck.
The cumulative RAM of your three Legends cards sets the maximum RAM value for color cards permitted in your deck. If you want to use more powerful cards of a specific color, you need to use more Legends of the same color to increase your limit.
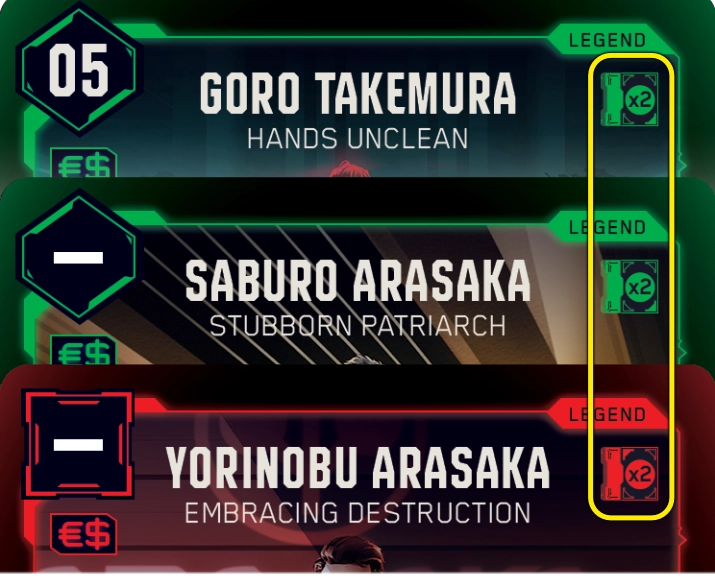
Each Legend’s RAM limit only counts towards their own color. If you want to build a deck with multiple card colors, then you need to choose your Legends with RAM for each included color. For example, if you want to run a Green and Red deck with Goro Takemura: Hands Unclean (2 Green RAM), Saburo Arasaka: Stubborn Patriarch (2 Green RAM), and Yorinobu Arasaka: Embracing Destruction (2 Red RAM), then your deck may include Green cards with up to 4 RAM and Red cards with up to 2 RAM.


Turn a card sideways to spend it. Sideways cards are referred to as “spent,” while upright cards are “ready.” Once a card is spent, you can’t spend it again until it readies at the start of your next turn (or via another effect). Eddies and Legends spend to pay card costs, and Units spend when they attack.
Turn a card upright to ready it. Upright cards are referred to as “ready,” while sideways cards are “spent.” Only ready Units can attack, and ready Units can’t be attacked.
Eddies, short for eurodollars, are the currency in Night City. Each face-down card in your Eddies area is 1 Eddie. Spend them (turn them sideways) to pay card play and effect costs.
In card text, the eurodollar symbol (€$) refers to Eddies and Legends you spend to pay a cost. While you can spend Legends as 1 €$ each, they’re not actually Eddies.
Number in the top left corner of a card. Spend Eddies equal to a card’s cost to play it. (You can also spend any number of Legends as 1 €$ each.)
Once per turn, you can sell any card in your hand with an Sell Tag in the top left corner. To sell a card, reveal it to your Rival, then place it face-down in the Eddies area. Keep in mind, no matter how much a card may have cost in your hand, it’s only worth 1 €$ per turn after it’s sold.
Gigs are the jobs that will make your crew Legendary, and are represented by Gig dice. The first player to start their turn with 7 or more Gigs wins the game. Gigs are the main focus of combat; attack your Rival’s Gig area to steal their Gigs, and protect your own from them.
Some card effects require a certain amount of ![]() (Street Cred) to activate. Street Cred is the sum total of the dice in your Gig area. In other words, add up all the numbers on the top face of your Gig dice to calculate your Street Cred.
(Street Cred) to activate. Street Cred is the sum total of the dice in your Gig area. In other words, add up all the numbers on the top face of your Gig dice to calculate your Street Cred.
In Night City, a fixer is a middleman between clients and mercenaries: they hook your crew up with new Gigs. All dice start in the fixer area at the beginning of the game. At the start of each turn, choose one die from this area, roll it to set its value, then move it to your Gig area. You can pick any die you want, except for the d20, which is always last.
Units with Lag can’t attack or activate self-spend effects. All Units enter the field with Lag, which lasts until the end of the turn.
Number in the bottom-right corner of a card, used while attacking. Units compare their power in a fight. When a Unit attacks a Gig area, it steals an additional Gig for every 10 power it has.
Each turn, you may spend 1 €$ to flip a Legend face-up. You can do this during your main phase, or as a reaction when a rival Unit attacks.
Keyword meaning to put cards at the bottom of your deck in any order.
Keyword meaning to put the top card of your deck into your trash area. If it specifies a number, trash that many cards.
GAME DESIGN AND RULES: Richard Zapp, Chris Solis, David McDarby, Casey Campbell, Madeline Anthony
PRELIMINARY GAME DEVELOPMENT: Brieger Creative — John Brieger, Breeze Grigas, Bryan Lue